I'm always amazed when people don't know about this very easy process of changing a building's Levels to reflect the actual RL's of the site.
All to often people tell me how they go through the tedious process of selecting all their levels and using the move command, then have to select all their views/details/text etc and move it all up or down to align with the new location.
Are you crazy!! Never do this!
Revit has multiple coordinate systems. An internal coordinate system and a shared coordinate system. By default all coordinates, whether they be levels, spot elevations, contour tags, spot coordinates all report the internal coordinate system. Each of these can be easily changed in their TYPE properties to use shared. Unfortunately the Nomenclature varies, but the principle is the same:
Level Type Properties: (change "Elevation Base" to shared)

Spot Elevation Type Properties: (change "Elevation Origin" to shared)

Spot Coordinate Type Properties: (change "Coordinate Origin" to Shared)

Contour Label Type Properties: (change "Elevation Base" to Shared)

Best Practice the Internal Coordinates of "Ground Level" should always be 0.
To move the building:

- Switch to an Elevation/Section,
- On the Manage Tab, Project Location Panel, Position Drop down, Choose "Relocate Project"
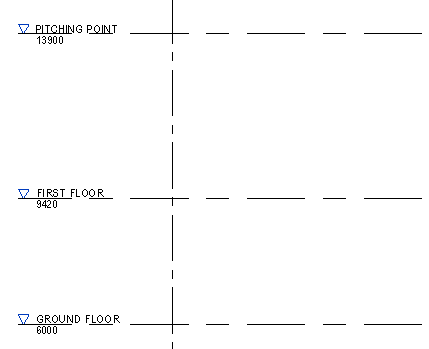
- The tool works just like the move command, select the base point to move relative to, then the distance and direction you want to move it in (best to only move it vertically in elevation/section). In this example I'm going to move my levels 6000mm up.
- Done, coordinates have been changed, all views are still intact and no cleanup required. For those who have been doing it some other way. Please don't do anything irrational. Think of all the time you can now save...
This method is also better when working with multiple discipline models and the copy/monitor. If people are using the move command to move their project around it causes everyone grief in this scenario.
Hope this helps.
8 comments:
This method doesn't seem to work with Toposurfaces. The levels for Toposurfaces can only be set to "Absolute Elevation". Therefore if you use the Shared Coordinates for your floor levels and then draw a Toposurface with the levels close to the RL's of your floor level, the Toposurfae will be created a lot higher up than your floor level is drawn. Is there a way around this (i.e. get the Toposurface to use the Shard Coordinates as well)?
Of course. Let me first state that 9/10 times I am simply importing a 3D survey from AutoCAD to generate the Toposurface. When importing it does need to host to a level, generally ground floor. Then I simply move the AutoCAD file in elevation down by the shared coordinate RL that the Ground Level represents. As such if, drawing a topography through placing points, I'd just let it be up really high to begin with. Then when finishing the sketch using the move command to position it correctly with the building. For the placement of the points there is no way as yet to tell these to be based off the shared coordinate system.
HTH.
NOOB here, extremely frustrated with Revit's logic. I have no cad from which to import. I do have a .jpg with spot elevations, from which I've created the beginning of a toposurface by placing points aligning to the imported image. I now know my finish floor elevation and want the toposurface to correspond to it. It looks like my only option is to change my finish floor elevation to its actual height, or the topo ends up 3400' above the building. You say "Are you crazy!! Never do this!" I must be crazy because the program is driving me crazy! I just need to get on with my design and have wasted almost two hours unsuccessfully reconciling floor and topo elevations coordinate systems!
Unfortunately, the Revit "Help" is worthless for this topic. Can you tell me what I should do so that I can continue to develop my toposurface without moving it up and down 3400' every time I need to make a refinement to it?
Regarding my last question: Is the simple solution to create a separate site file and link in the building? Then I can move the building in x, y & z directions on the site and publish the coordinates back to the building file?
9/10 projects I have the site as a separate file. Simply for the fact that is much easier to move a the building around on the site, or the site underneath the building as a link. The only time I'll model the site in the same file is if the building pretty much occupies 100% of the site and thus doesn't have to move anywhere.
So yes I would suggest that.
im having an issue here, related with this post.
im working on a multi-storey building, and had to move all levels about 10" up. i just moved the model and its ok, but all annotations on sections and elevations are still on the same position. i can figure out another way, but select annotation by annotation, on every section and every elevation. very slow and tedious process. not smart at all.
thnaks
What if you had more than one level that had to move and by different values? What if both those levels were above level 1?
Please note, this is only reference to keeping the Ground Level at RL 0.0 internal coordinates. If you need to move multiple levels by different amounts, you'd use this method to move Ground Level to the correct Shared Coordinate RL. Other levels would then be adjusted using the move command...
Post a Comment